Component testing in Nightwatch has been refined with version 2.4 and support for testing React components (via the @nightwatch/react plugin) has been significantly improved. We also released a new plugin for using the popular Testing Library with Nightwatch - @nightwatch/testing-library, available since Nightwatch v2.6.
We're now going to build a detailed example of how to use Nightwatch and Testing Library to test React components. We'll be Complex example available on the React Testing Library docs, which is written with Jest.
In this tutorial, we'll cover how to:
- set up a new React project with Vite, which is also what Nightwatch uses internally for component testing;
- install and configure Nightwatch and Testing Library;
- mock API requests using the
@nightwatch/api-testingplugin; - write a complex React component test using Nightwatch and Testing Library.
Step 0. Create a new project
To get started, we'll create a new project with Vite:
npm init vite@latest
Select React and JavaScript when prompted. This will create a new project with React and JavaScript.
Step 1. Install Nightwatch and Testing Library
Testing Library for React can be installed with the @testing-library/react package:
npm i @testing-library/react --save-dev
To install Nightwatch, run the init command:
npm init nightwatch@latest
Select Component testing and React when prompted. This will install nightwatch and the @nightwatch/react plugin. Choose a browser to install the driver for. We'll be using Chrome in this example.
1.1. Install @nightwatch/testing-library plugin
Since v2.6, Nightwatch provides its own plugin for using the Testing Library queries directly as commands. We're going to need it to write our test later on so let's install it now:
npm i @nightwatch/testing-library --save-dev
1.2 Install @nightwatch/apitesting plugin
The example contains a mock server that is needed to test the component. We'll be using the integrated mock server that comes with the @nightwatch/apitesting plugin. Install it with:
npm i @nightwatch/apitesting --save-dev
Step 2. Create the Login component
We'll use the same component as in the React Testing Library docs. Create a new file src/Login.jsx and add the following code:
// login.jsx
import * as React from 'react'

function Login() {
  const [state, setState] = React.useReducer((s, a) => ({...s, ...a}), {
    resolved: false,
    loading: false,
    error: null,
  })

  function handleSubmit(event) {
    event.preventDefault()
    const {usernameInput, passwordInput} = event.target.elements

    setState({loading: true, resolved: false, error: null})

    window
      .fetch('/api/login', {
        method: 'POST',
        headers: {'Content-Type': 'application/json'},
        body: JSON.stringify({
          username: usernameInput.value,
          password: passwordInput.value,
        }),
      })
      .then(r => r.json().then(data => (r.ok ? data : Promise.reject(data))))
      .then(
        user => {
          setState({loading: false, resolved: true, error: null})
          window.localStorage.setItem('token', user.token)
        },
        error => {
          setState({loading: false, resolved: false, error: error.message})
        },
      )
  }

  return (
    <div>
      <form onSubmit={handleSubmit}>
        <div>
          <label htmlFor="usernameInput">Username</label>
          <input id="usernameInput" />
        </div>
        <div>
          <label htmlFor="passwordInput">Password</label>
          <input id="passwordInput" type="password" />
        </div>
        <button type="submit">Submit{state.loading ? '...' : null}</button>
      </form>
      {state.error ? <div role="alert">{state.error}</div> : null}
      {state.resolved ? (
        <div role="alert">Congrats! You're signed in!</div>
      ) : null}
    </div>
  )
}

export default Login
Step 3. Create the component test
One of the founding principles of Testing Library is that tests should resemble how users interact with the application as much as possible. When writing component tests in Nightwatch using JSX, we need to write the test as a component story using the Component Story Format, a declarative format introduced by Storybook.
This enables us to write tests that focus on how the component is used, rather than how it's implemented, which is in line with the Testing Library philosophy. You can read more about this in the Nightwatch docs.
The great thing about using this format to write our tests is that we can use the same code to write stories for our components, which can be used to document and showcase them in Storybook.
3.1 Login with valid credentials test
Create a new file src/Login.spec.jsx and add the following code, which does the same as the complex example written with Jest:
To render the component using JSX in Nightwatch, we simply create an export for the rendered component, optionally with a set of props. The play and test functions are used to interact with the component and verify the results.
playis used to interact with the component. It's executed in the browser context, so we can use thescreenobject from Testing Library to query the DOM and fire events;testis used to verify the results. It's executed in the Node.js context, so we can use the Nightwatchbrowserobject to query the DOM and verify the results.
// login.spec.jsx
import {render, fireEvent, screen} from '@testing-library/react'
import Login from '../src/login'

export default {
  title: 'Login',
  component: Login
}

export const LoginWithValidCredentials = () => <Login />;
LoginWithValidCredentials.play = async ({canvasElement}) => {
  //fill out the form
};

LoginWithValidCredentials.test = async (browser) => {
  // verify the results
};
Add the mock server
The example uses a mock server to simulate a login request. We'll be using the integrated mock server that comes with the @nightwatch/apitesting plugin.
For this we'll use the setup and teardown hooks which we can write directly in the test file. Both hooks are executed in the Node.js context.
We also need to set login endpoint to http://localhost:3000/api/login in the Login component, which is the url to the mock server.
Complete test file
The complete test file will look like this:
// login.spec.jsx
import {render, fireEvent, screen} from '@testing-library/react'
import Login from '../src/Login'

let server;
const token = 'fake_user_token';
let serverResponse = {
  status: 200,
  body: {token}
};

export default {
  title: 'Login',
  component: Login,
  setup: async ({mockserver}) => {
    server = await mockserver.create();
    server.setup((app) => {
      app.post('/api/login', function (req, res) {
        res.status(serverResponse.status).json(serverResponse.body);
      });
    });

    await server.start(mockServerPort);
  },

  teardown: async (browser) => {
    await browser.execute(function() {
      window.localStorage.removeItem('token')
    });

    await server.close();
  }
}

export const LoginWithValidCredentials = () => <Login />;
LoginWithValidCredentials.play = async ({canvasElement}) => {
  //fill out the form
  fireEvent.change(screen.getByLabelText(/username/i), {
    target: {value: 'chuck'},
  });

  fireEvent.change(screen.getByLabelText(/password/i), {
    target: {value: 'norris'},
  });

  fireEvent.click(screen.getByText(/submit/i))
};

LoginWithValidCredentials.test = async (browser) => {
  const alert = await browser.getByRole('alert')
  await expect(alert).text.to.match(/congrats/i)

  const localStorage = await browser.execute(function() {
    return window.localStorage.getItem('token');
  });

  await expect(localStorage).to.equal(fakeUserResponse.token)
};
Debugging
One of the main benefits of using Nightwatch for component testing, besides having the same API available for end-to-end testing, is that we can run the tests in a real browser, instead of a virtual DOM environment, such as JSDOM.
This allows us to use the Chrome Dev Tools to debug the tests.
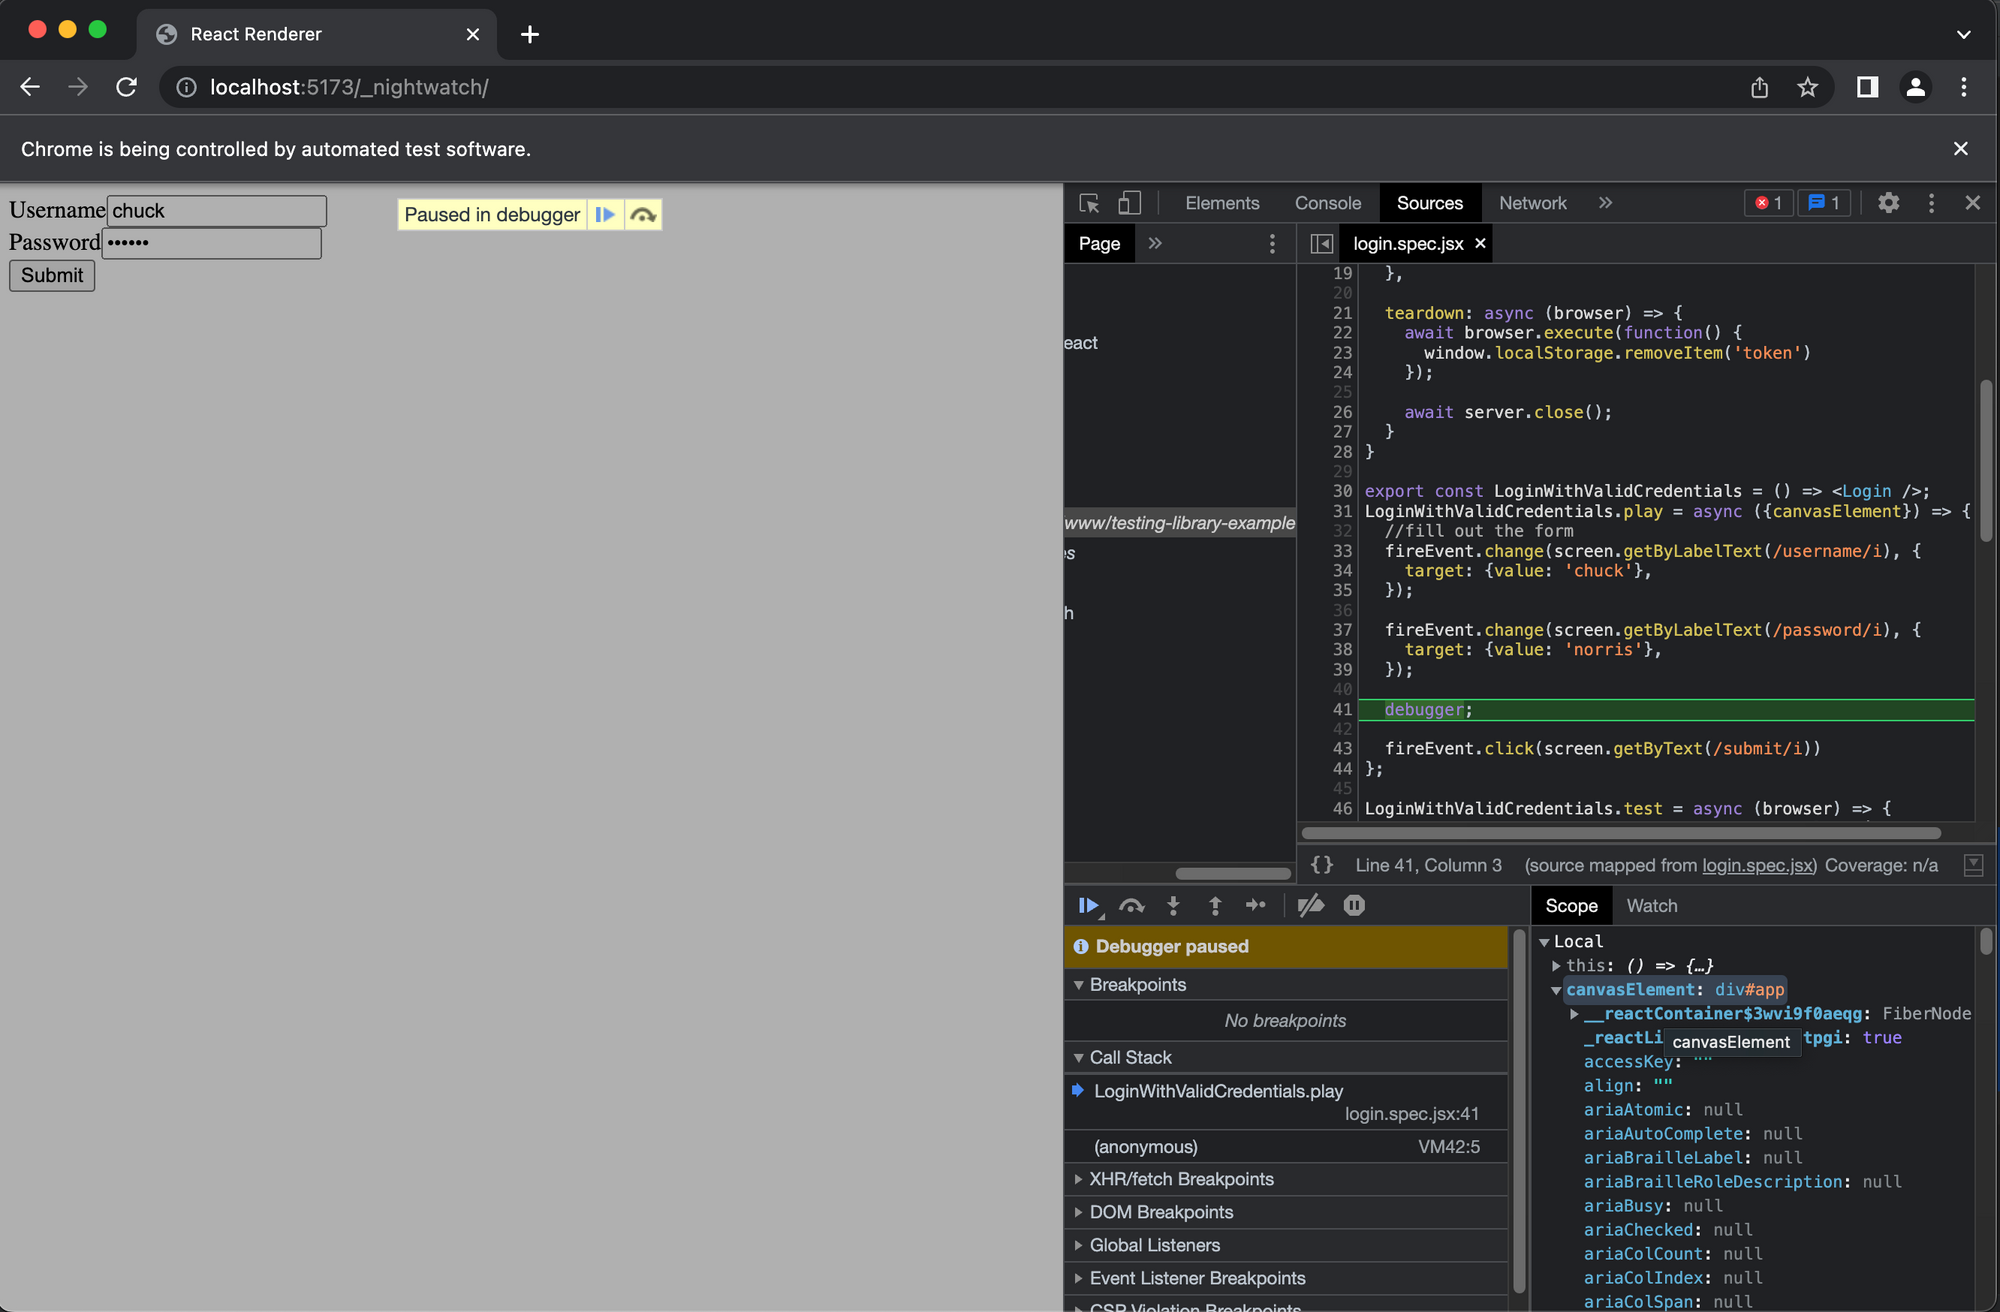
For example, let's go ahead and add a debugger statement in the LoginWithValidCredentials.play function:
LoginWithValidCredentials.play = async ({canvasElement}) => {
  //fill out the form
  fireEvent.change(screen.getByLabelText(/username/i), {
    target: {value: 'chuck'},
  });

  fireEvent.change(screen.getByLabelText(/password/i), {
    target: {value: 'norris'},
  });

  debugger;

  fireEvent.click(screen.getByText(/submit/i))
};
Now, let's run the test with --debug and --devtools flags:
npx nightwatch test/login.spec.jsx --debug --devtools
This will open a new Chrome window with the Dev Tools open. We can now set a breakpoint in the Dev Tools and step through the code.
3.2 Login with server exception test
The original example from the TestingLibrary docs also includes a test for the case when the server throws an exception.
Let's try to write the same in Nightwatch. This time we'll use just the test function, since we can interact with the component this way as well. As we've mentioned earlier, the test function is executed in the Node.js context, and it receives the Nightwatch browser object as argument.
We'll also need to update the mock server response to return a 500 status code and an error message. This we can easily accomplish by writing a preRender test hook on the LoginWithServerException component story.
export const LoginWithServerException = () => <Login />;
LoginWithServerException.preRender = async (browser) => {
  serverResponse = {
    status: 500,
    body: {message: 'Internal server error'}
  };
};

LoginWithServerException.test = async (browser) => {
  const username = await browser.getByLabelText(/username/i);
  await username.sendKeys('chuck');

  const password = await browser.getByLabelText(/password/i);
  await password.sendKeys('norris');

  const submit = await browser.getByText(/submit/i);
  await submit.click();

  const alert = await browser.getByRole('alert');
  await expect(alert).text.to.match(/internal server error/i);

  const localStorage = await browser.execute(function() {
    return window.localStorage.getItem('token');
  });

  await expect(localStorage).to.equal(token)
};
4. Run the test
Finally, let's run the test. This will run the LoginWithValidCredentials and LoginWithServerException component stories in Chrome.
npx nightwatch test/login.spec.jsx
To run the test without opening the browser, we can pass the --headless flag.
If all goes well, you should see the following output:
[Login] Test Suite
────────────────────────────────────
ℹ Connected to ChromeDriver on port 9515 (1134ms).
  Using: chrome (108.0.5359.124) on MAC OS X.

Mock server listening on port 3000

  Running <LoginWithValidCredentials> component:
──────────────────────────────────────────────────────────────────────────────────────────────────────────────────────────────────────
[browser] [vite] connecting...
[browser] [vite] connected.
  ✔ Expected element <LoginWithValidCredentials> to be visible (15ms)
  ✔ Expected element <DIV[id='app'] > DIV > DIV> text to match: "/congrats/i" (14ms)
  ✔ Expected 'fake_user_token'  to equal('fake_user_token'):

  ✨ PASSED. 3 assertions. (1.495s)

  Running <LoginWithServerException> component:
──────────────────────────────────────────────────────────────────────────────────────────────────────────────────────────────────────
[browser] [vite] connecting...
[browser] [vite] connected.
  ✔ Expected element <LoginWithServerException> to be visible (8ms)
  ✔ Expected element <DIV[id='app'] > DIV > DIV> text to match: "/internal server error/i" (8ms)
  ✔ Expected 'fake_user_token'  to equal('fake_user_token'):

  ✨ PASSED. 3 assertions. (1.267s)

  ✨ PASSED. 6 total assertions (4.673s)
5. Conclusion
That's it! You can find the complete code for this example in the GitHub repository. PRs are welcome.
Fell free to drop by the Nightwatch Discord if you have any questions or feedback.